![University of Idaho Library [logo]](https://www.lib.uidaho.edu/media/images/ui_library_horizontal.png)
Studio LED Sign User Guide
Enjoy our Studio sign while recording your audio or video podcast!
Please follow these guidelines to ensure your and others’ safety and effective use of the sign.
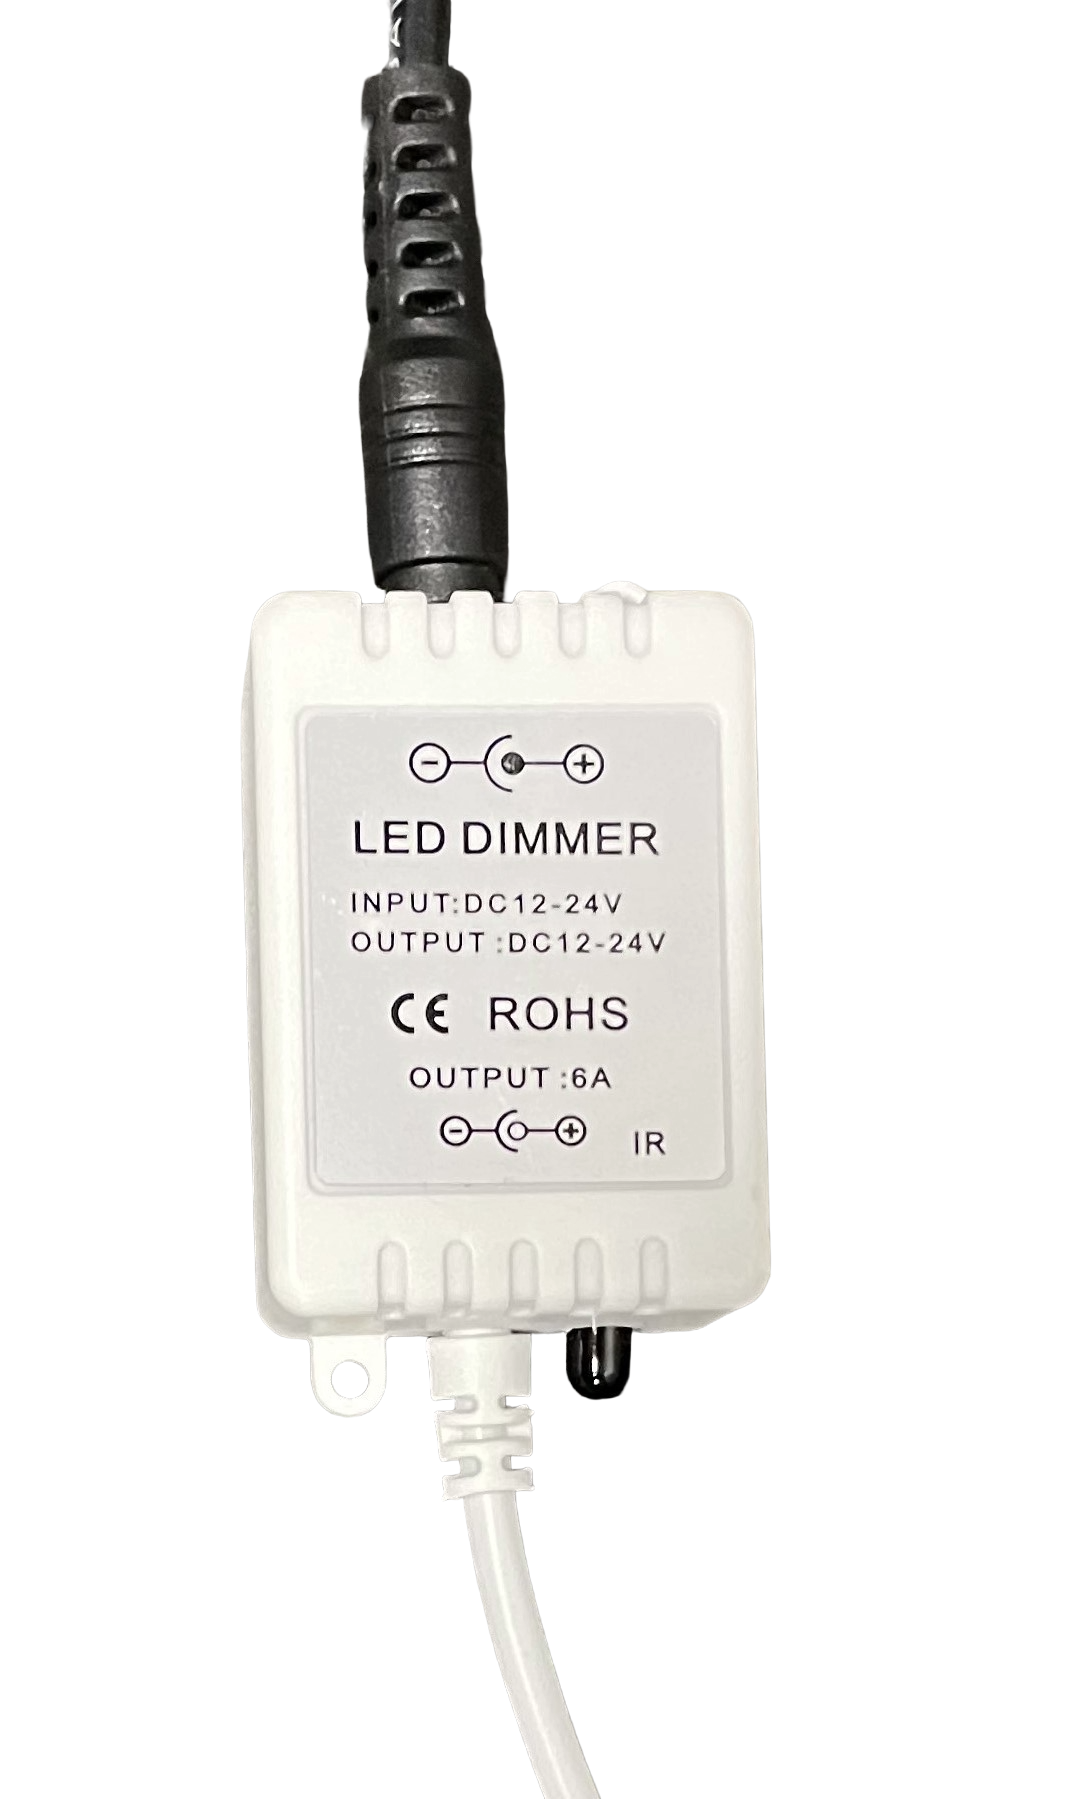
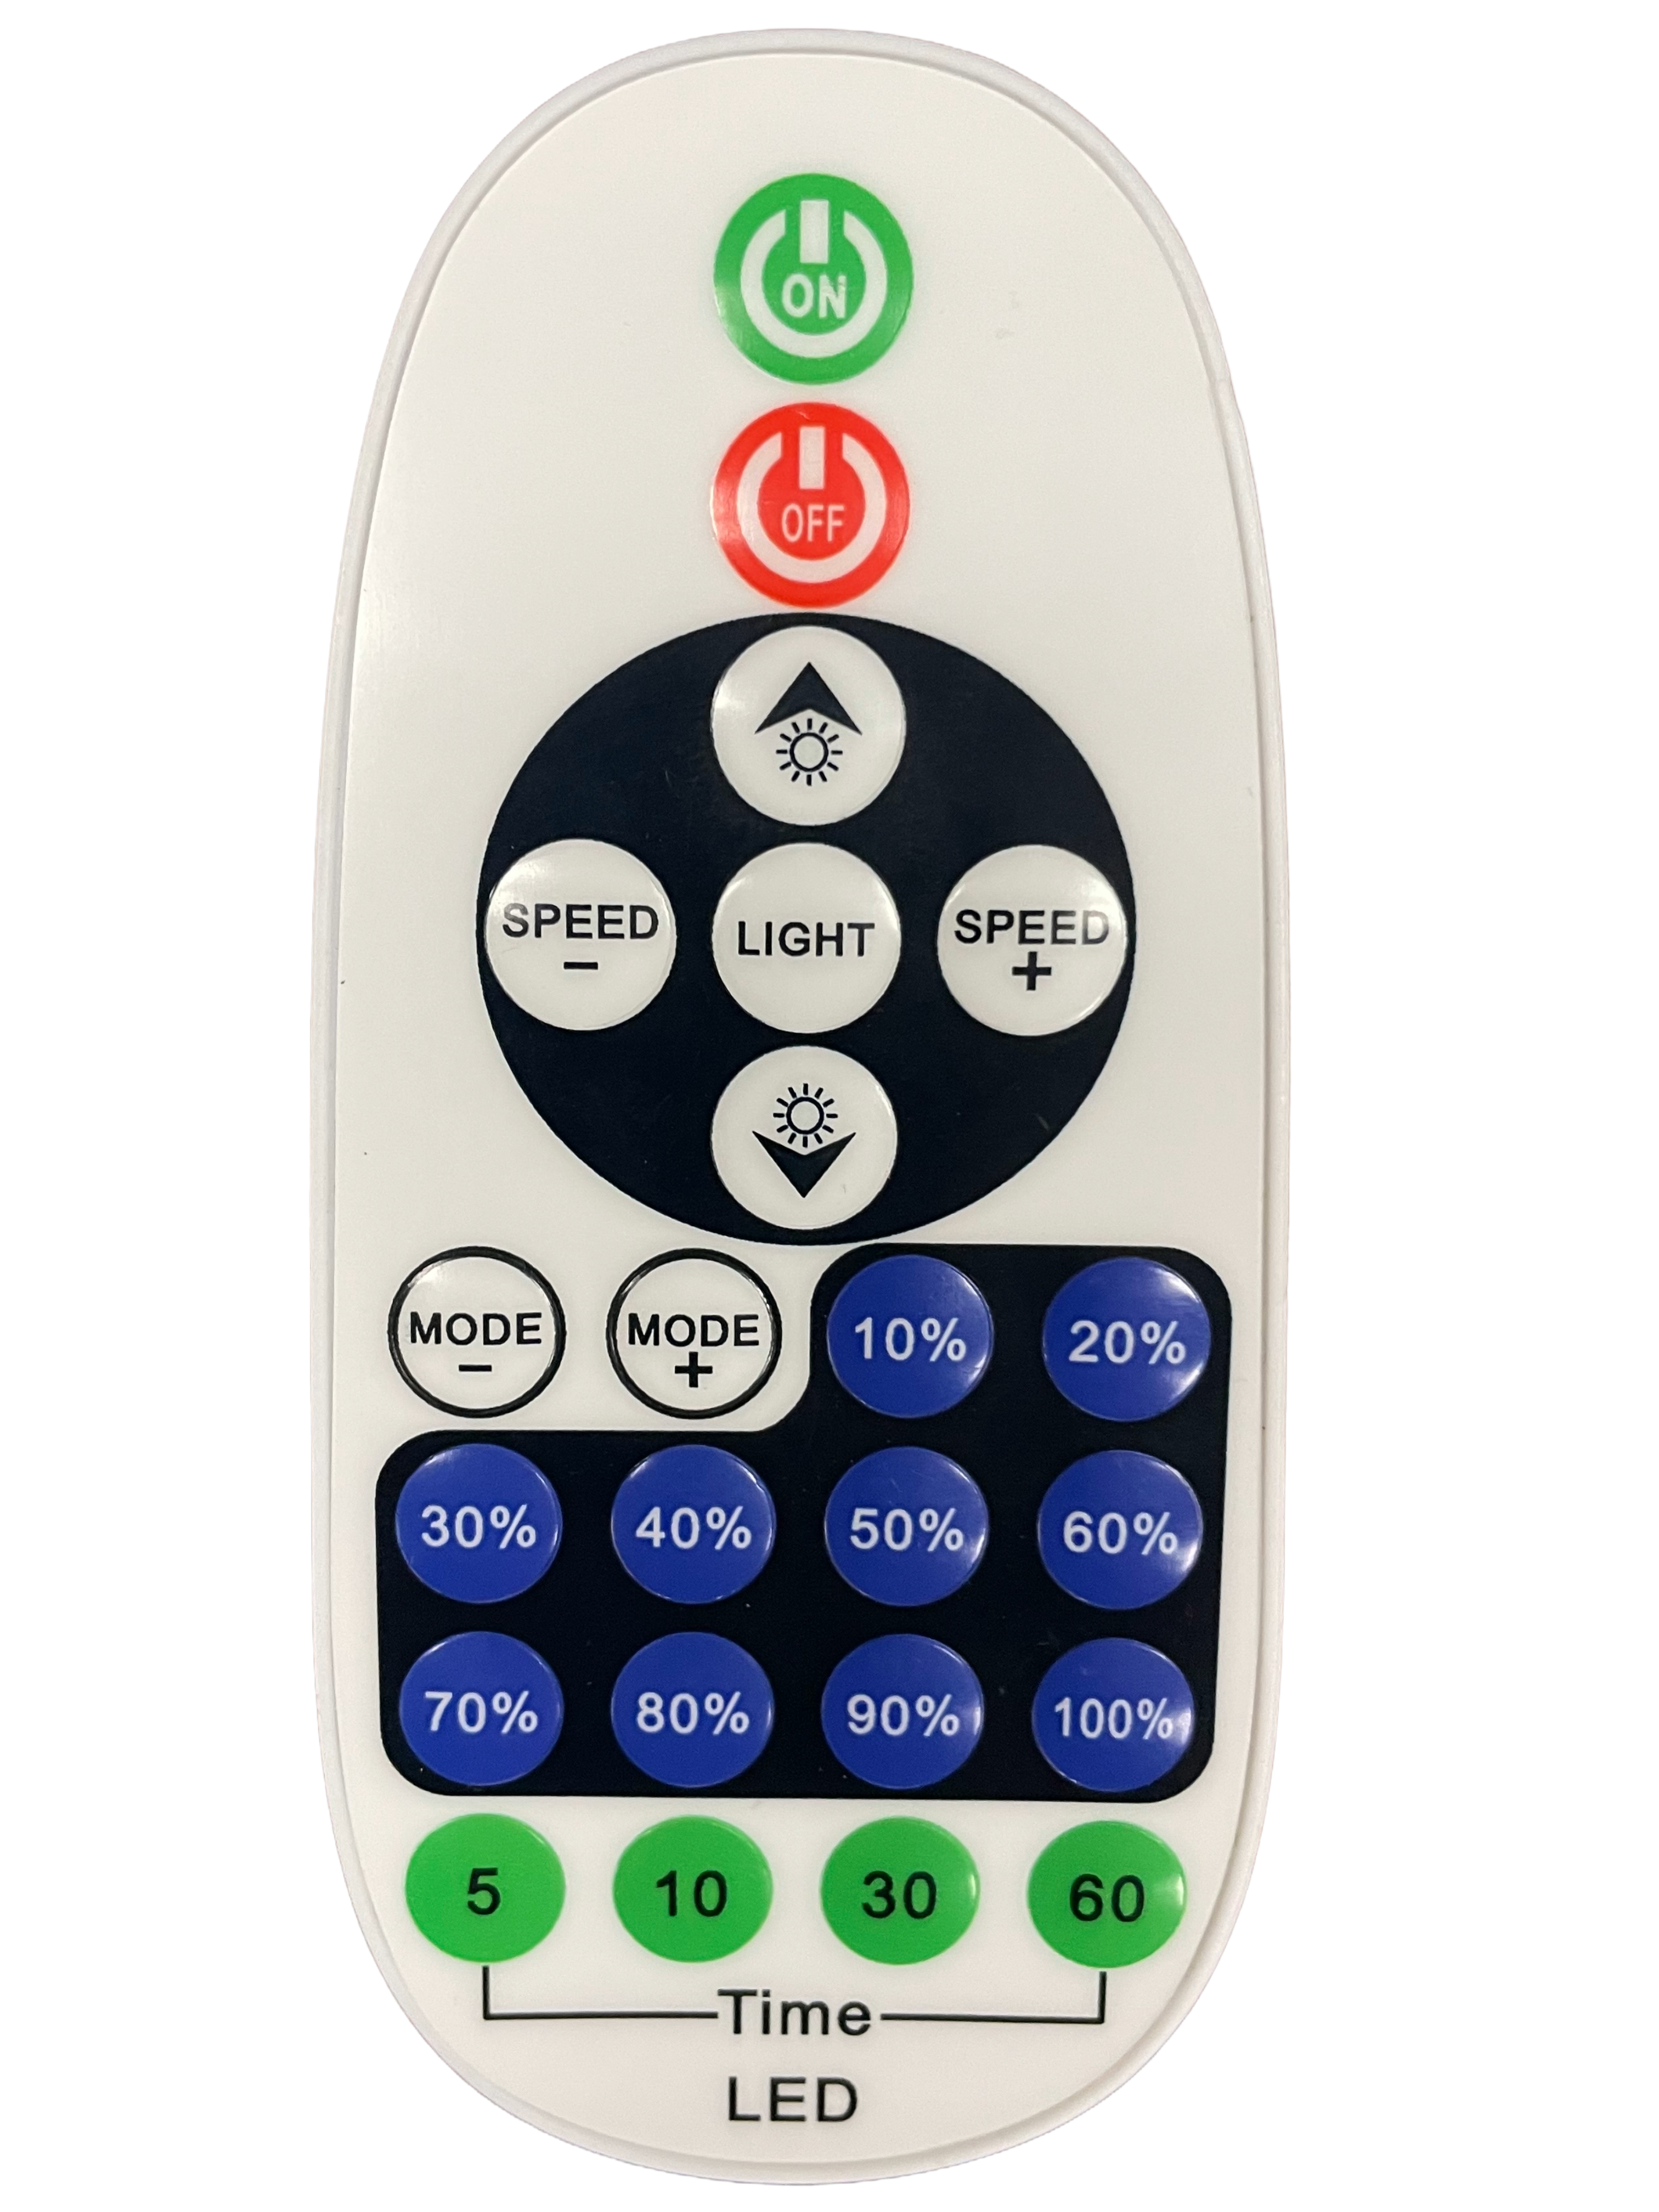
- The sign includes an optional dimmer and remote. The remote will only function when the dimmer is attached via the electrical cable (see below).
- PHOTOSENSITIVITY WARNING:
- Avoid using the Mode and Speed buttons on the remote – these activate a rapid flashing mode, which could be harmful to the eyes, or trigger epileptic seizures, or both.
- Press the Light button to turn off flashing mode, if activated.
- The Light button returns the sign to 100% brightness with no flashing.
- The % and sun with upward and downward buttons can be used to adjust the brightness.
- Turn the sign OFF when not in use.
For use when video recording
The dimmer changes the sign’s brightness by flickering the LEDs at a certain frequency. The lower the brightness, the more noticeable the flicker can be on camera.
To prevent flickering when using the sign in videos:
- Make sure the sign is off. Unplug the sign from the power outlet.
- Remove the dimmer (located between the electrical cable and clear sign cable).
- Connect the electrical cable directly to the sign cable.
- Plug the electrical cable into the power outlet.
- When finished, unplug the sign to turn it off, and reconnect the dimmer.
Please note that the remote does not function without the dimmer.