![University of Idaho Library [logo]](https://www.lib.uidaho.edu/media/images/ui_library_horizontal.png)
Esri Software Authorization
Authorization information for Esri products.
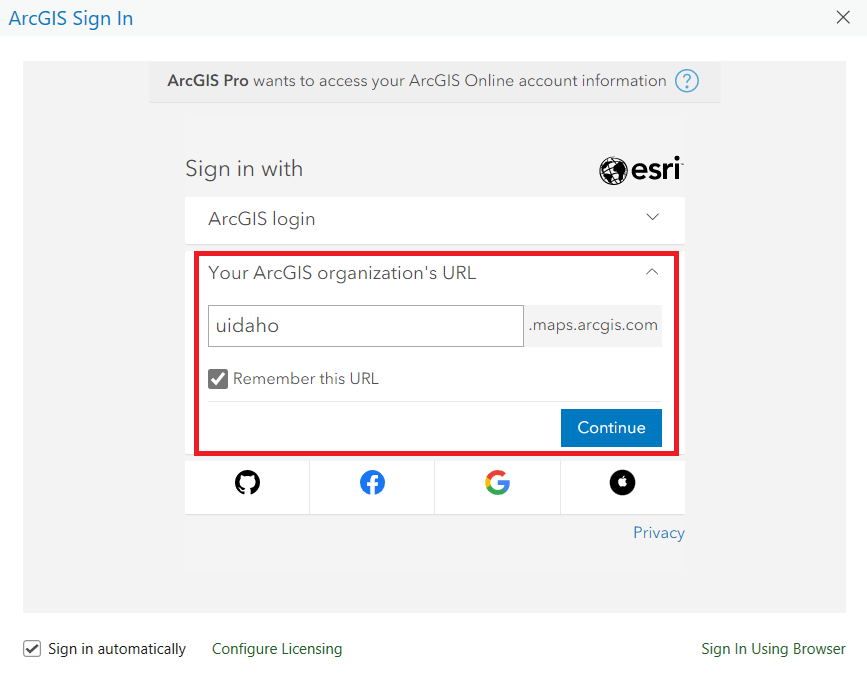
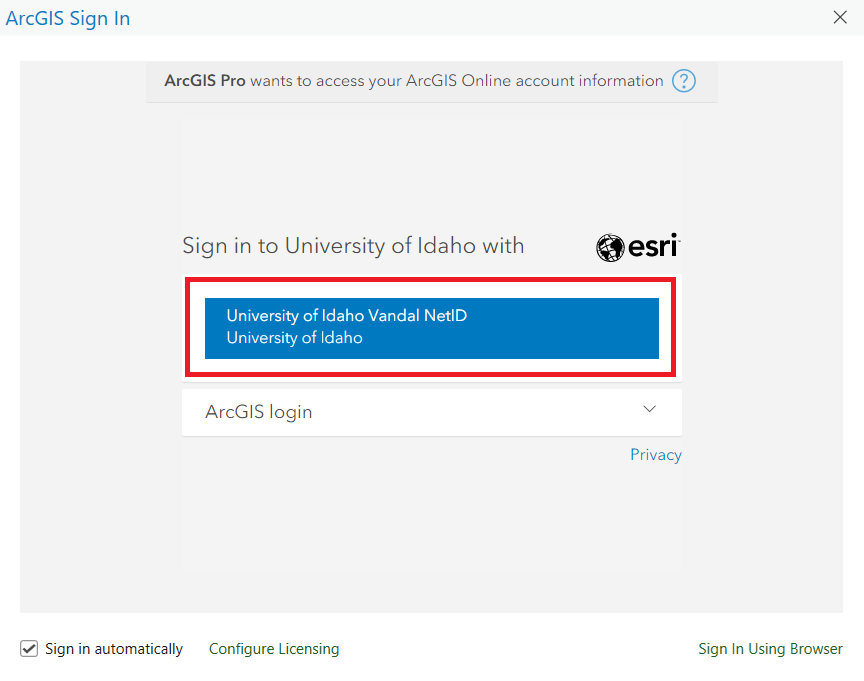
ArcGIS Pro
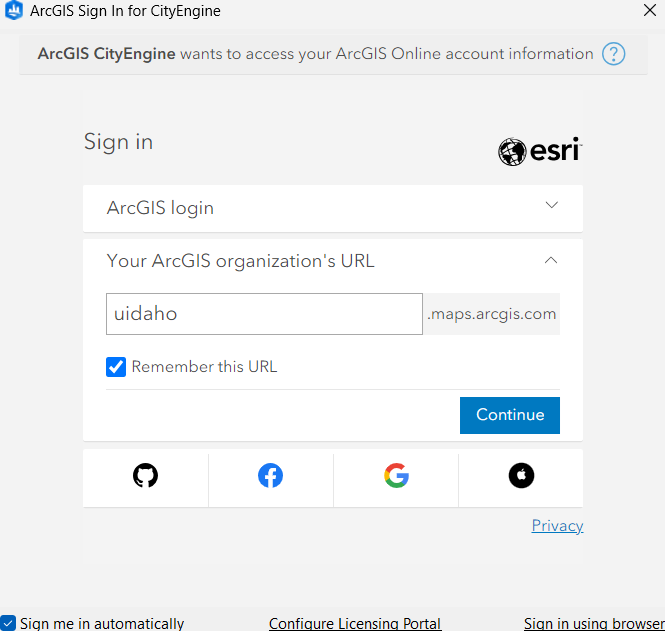
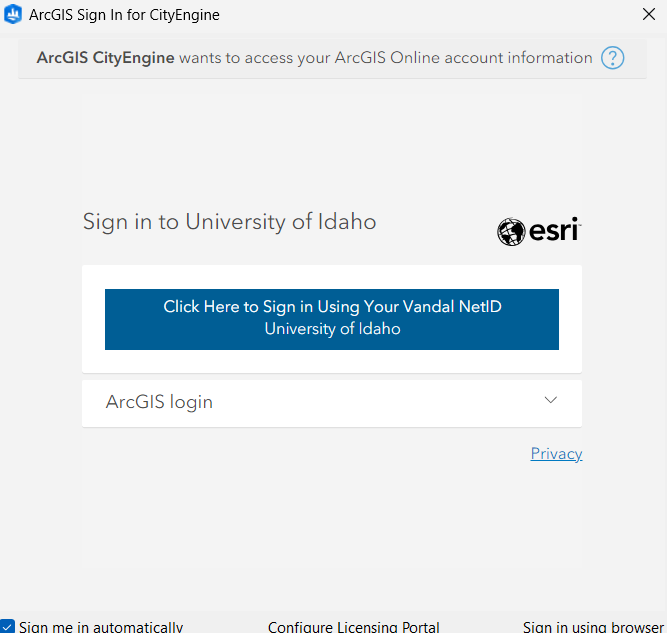
- Start ArcGIS Pro on your computer and enter 'uidaho' in the text box under 'Your ArcGIS organization's URL'. Select the 'Remember this URL' option and push the 'Continue' button. On the subsequent screen click on the blue button and sign in using your Vandal NetID. See the pictures below.
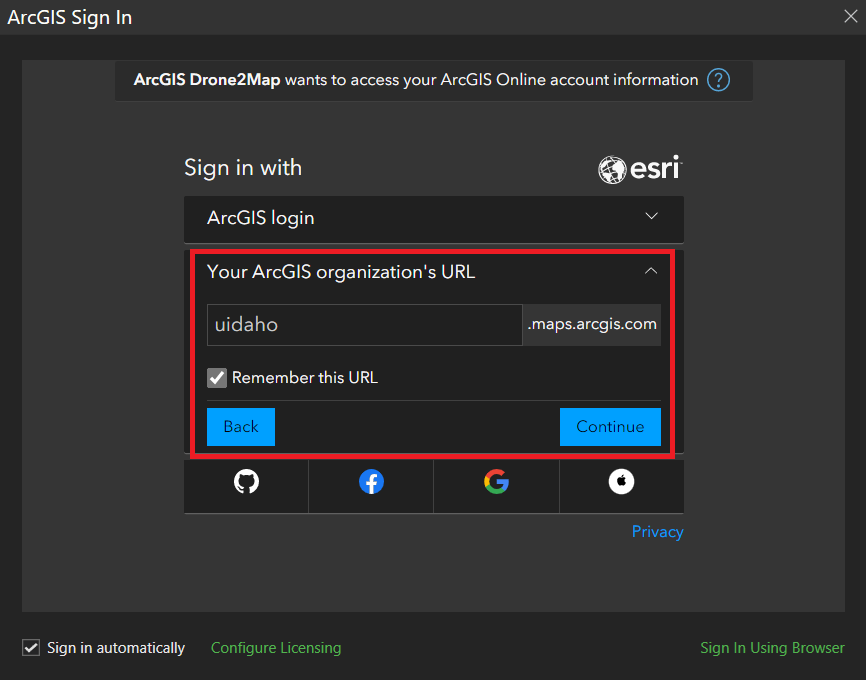
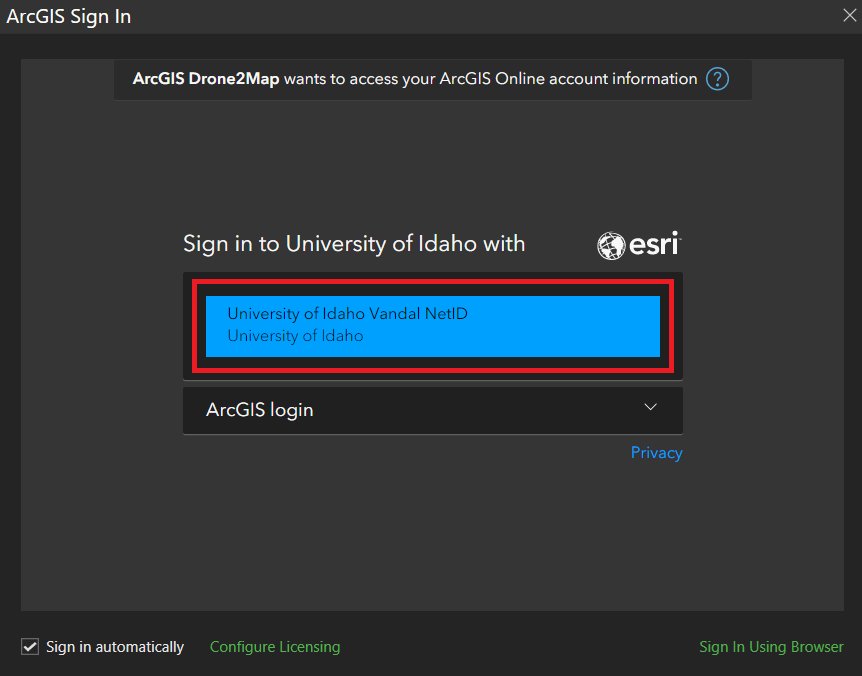
ArcGIS Drone2Map
- Start ArcGIS Drone2Map on your computer and enter 'uidaho' in the text box under 'Your ArcGIS organization's URL'. Select the 'Remember this URL' option and push the 'Continue' button. On the subsequent screen click on the blue button and sign in using your Vandal NetID. See the pictures below.
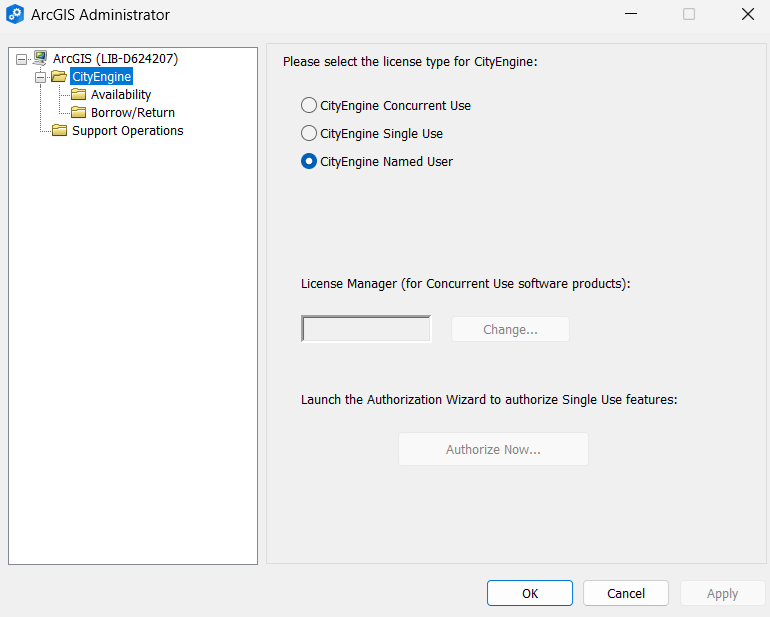
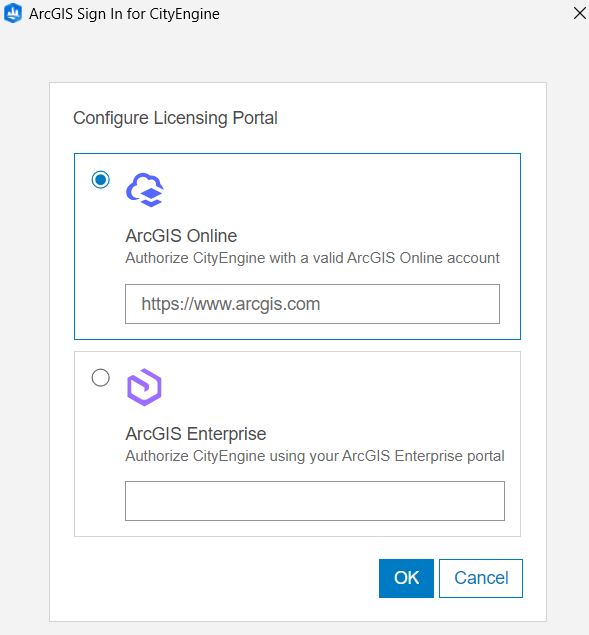
ArcGIS CityEngine
- ArcGIS CityEngine can now be licensed through ArcGIS Online. The first time you start the program you will need to configure the authorization process. From that point forward you will only need to use your user name and password. THe first time you start ArcGIS CityEngine on your computer follow all the screenshots below. Subsequently, just follow the last two screenshots [i.e. enter 'uidaho' in the text box under 'Your ArcGIS organization's URL'. Select the 'Remember this URL' option and push the 'Continue' button. On the subsequent screen click on the blue button and sign in using your Vandal NetID.]